BarCamp Birmingham 2 Presentations

At last Saturday’s BarCamp Birmingham, I gave three presentations. The first was on Virtual PC 2007. For more info on it just look to my previous post, which has the first video on VPC. I’m currently working on the other videos in the series and should have them up this week.

My second presentation was “The Developer’s Experience”. As promised in the session, here’s the complete PDF of my slides: The Developer Experience. This has hyperlinks to all of the tools I presented.

My final presentation was on Full Text Searching on SQL Server 2005.  First, here is a PDF of the PowerPoint slides: Full Text Search Power Points

Next, most of the demos used SQL statements. This PDF file has all of the SQL plus some associated notes. Full Text Search Demo Scripts

Finally, I didn’t get to demo this at BarCamp due to time, but I do have a WPF project that demonstrated how to call a full text search query from a WPF Windows application. Annoyingly enough WordPress (who hosts my blog) won’t let me upload ZIP files, so I renamed the extension to pdf. After you download the file to your drive, remove the .pdf and put the zip extension back on, then it should expand all the source for you correctly. (Yes, I know, I really need to get a host server for binaries, one of these days I’ll get around to it, but for today…) Source for WPF Demo

See you at the next BarCamp!

Advertisement

Differencing Disks in Virtual PC 2007

Yesterday I mentioned I was going to get SQL Server 2008 installed in a Virtual PC (VPC). Now, I could have setup a virtual machine from scratch, or copied an existing one. But there’s a better way: differencing disks. Differencing disks allow you to create a virtual machine, then use it as a base for new machines. Much like you would create a base class and then let new classes inherit from your base.

My first step was to create a brand new virtual PC. I chose Windows Server 2003, using the one from my MSDN license. I could also have gone with XP, or the advanced versions of Vista licenses you to install up to four virtual machines in addition to itself as the host. So I get my VPC setup with Windows Server 2003, and make sure all of the windows updates have been applied, service packs, etc. In addition, if there are any additional tools / utilities I’d like to have available for every machine I’ll be wanting create from it I’ll install those as well. I’m thinking of things like UltraEdit / Notepad++, IE7, AllSnap, etc. I finally conclude by shutting down the machine.

Exit Virtual PC, and go to the folder where your virtual PC’s reside. First delete the VMC file (the small one) of your Virtual PC. You won’t need it any more, as you’ll never open this VPC directly. If you did, you would break all the machines that inherit from it. Again, not unlike changing the signature of a base class.

Next, mark the VHD, the hard drive as Read Only. Again this is for your protection, to keep you from doing something accidental to the base. At this point we have our base machine created, and can now make new machines from it.

Launch Virtual PC again. Click on File, Virtual Disk Wizard. You are given a simple dialog that lets you know you’re in the Virtual Disk Wizard. Click Next to move along.

[Picture 1 - Welcome to Virtual Disk Wizard]

Next it asks if we want to create a new disk or edit an existing one. We’ll want to create a new one, so just click Next.

[Picture 2 - Create a new virtual disk]

Now it wants to know what kind of disk to create. We’re doing a hard disk, so just take the default of virtual hard disk and click next.

[Picture 3 - Disk Type]

Now it asks where you want to put your virtual hard disk. I keep mine on my D drive, and use a naming convention. I start with the OS, then the main software I am using. I then use either the word Working, to indicate it’s alright to launch and work in it, or Base, to show the vhd should only be used to inherit from and not be launched. In this case I will be using this as a working area for my SQL Server 2008 CTP6, so I used Working. You are free of course to name it whatever you want, use a name like “Hanselman is cool.vhd” if you like I just prefer something a bit more logical.

[Picture 4 - Disk Location]

OK, this is where you need to pay attention, as this is the first time you’ll need to change a default. Here you are asked what type of virtual hard drive to create. The default is dynamically expanding, and it’s what you’d want to use if you are installing an OS from scratch or are creating a second hard drive for your virtual machine. Fixed size would be used if you are creating a disk for something like a USB drive and want to make sure it won’t get too big. Again, this would be used when you need an empty drive.

In our case we want the third option, Differencing. What this does is tell the Virtual PC application to base the new hard drive on an existing one. From here on out, only the changes you make to the virtual drive will be recorded. This has a lot of benefits. First it saves you disk space, in that you can use the same base with multiple virtual machines. Second, it lets you install the base OS only once, and not have to keep recreating it over and over. Finally, you can create multiple generations of disks. For example, I could create a base of Windows 2003, then another base with Visual Studio added. I could then use that base to inherit from, and create two drives. One could be used with SQL Server 2008, the other with SQL Server 2005. In our case we’re keeping it simple, so pick Differencing and click next.

[Picture 5 - Hard Disk Options]

Next we need to pick the virtual hard drive we want to base our new machine on. In this case I am selecting my Windows Server 2003 core base, and clicking next.

[Picture 6 - Pick Base Hard Drive]

Next we are told it has all the info it needs. All we have to do is click Finish and we’ll have our new Virtual Hard Disk.

[Picture 7 - Complete Disk Creation]

Virtual PC thoughtfully tells us it was successful.

[Picture 8 - Confirmation Message]

OK, we have a new disk, but now we need to tell Virtual PC we want to use it. Back on the Virtual PC Console, Select File, New Virtual Machine Wizard OR click the New… button on the console. Virtual PC has a need to tell us what we just picked, so just click Next.

[Picture 9 - Create Machine Wizard]

This time we are creating a new virtual machine, which will be based on the virtual hard drive we just created, so take the default and click next.

[Picture 10 - Create a machine]

Next we need to give our machine a name. I usually give it the same name as the hard drive, except for the vmc extension. Name yours and click next.

[Picture 11 - Macine name and location]

Now it asks what OS we’ll be using. Note it has automatically detected that I’m using Windows Server 2003, so all I have to do is click next.

[Picture 12 - Confirm Operating System]

Now it asks what my default RAM size will be. I figure 256 MB is a bit small, since I have the ram I upped it to 768 MB. Set yours according to the free space you can spare and click next.

[Picture 13 - Select default amount of memory]

Now we’re asked if we want to use an existing disk or create a new one. Obviously we want to use the differencing one we just created, so click next.

[Picture 14 - Existing Disk or New Disk - We want existing]

Next it asks where our existing drive is, pick it out using the Browse… button or type it in.

[Picture 15 - Pick name of existing disk]

Let me call your attention to the Check Box, “Enable undo disks”. If you leave this unchecked, your virtual machine will behave like a normal computer. Any changes you make are applied and saved. If you check the undo option on, then during your session any changes are written to a temporary file. When you exit the VPC, you are asked if you want to save any changes you made. If you say yes, they will be permanently applied to the virtual machine. If you say no, they are discarded, lost forever. Undo disks are ideal for test situations where you want to run the same changes over and over but not save them. Testing software installs, for example, or in a classroom where you want the students to do labs but not save them.

While Undo Disks can be very helpful, in this situation I don’t really need them as I want to keep all my changes so I will leave this unchecked and click next.

[Picture 16 - Complete Machine Wizard]

OK, we’re at the finish line. All we have to do is click Finish to complete the creation of our new virtual machine.

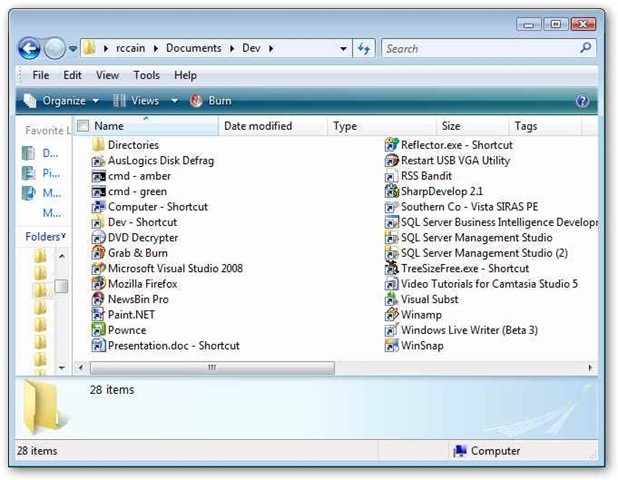
Let me call your attention to the file sizes of our new machine. Take a look at them in explorer…

[Picture 17 - Explorer snapsho showing small size of vhd]

Note how tiny the vhd file is right now. That’s because it’s based on another drive, where all the OS bits are. As we open it and apply changes (such as installing SQL Server 2008) it will grow in size, but we’ll always be able to save the disk space of the OS as it’s coming from another file.

The down side to differencing disks is speed, because they are in multiple files the performance won’t be as great. Additionally you can’t update the base machine without breaking its descendants. However, differencing disks offer several advantages as well. They save you time, in that you can create a base OS once and use it over and over. As you can see above they can also save you disk space, in that the core OS only takes up space once on your drive and not over and over.

Consider Differencing Disks, and whether they might be appropriate to your development environment.

The Developer Experience

In case you’re wondering why the slowdown in the blog this week, I’ve been spending all my free time getting ready for Alabama Code Camp 6. My first presentation of the day is “The Developer Experience”. It’s chock full of practical, low cost (or even free!) ways to make your life as a programmer more productive.

As promised in the session, here’s the complete PDF of my slides:  The Developer Experience

Do It Yourself Quick Launch Menu

One of my upcoming presentations at Alabama Code Camp 6 will be “The Developer Experience”. I intend to cover three aspects of the developer experience: physical, virtual, and mental. Falling into the virtual category are things like Windows and Visual Studio Add-Ins. Launcher programs seem very popular these days, and I’ll be covering a few of them in my presentation, but did you know it’s very easy to create your own “quick launch” menu right on the Windows Start Bar? (I’ve also heard it referred to as the Task Bar.)

Start by going to your “My Documents” or some other location on your drive. Create a new folder, and give it a name. I chose something short, “Dev”, since it’ll take up some space on the Start Bar and it was pretty descriptive. Now in this folder you should create short cuts to all the applications you use on a frequent basis. You can also create other folders, which will turn into submenus when we’re done. Here you can see I’ve got my shortcuts, plus one folder called “Directories” which holds shortcuts to folders I access frequently. Here’s a ‘best practice’ for you: I also find it a good idea to create a shortcut to the Dev folder itself, so you can quickly and easily add or remove shortcuts to your system.

diymenu01

Once you have all of your shortcuts, right click on your start bar and pick Toolbars, New Toolbar (I’m doing this in Vista by the way, but it works equally well in XP as I’ve done it there for years).

diymenu02

When the New Toolbar dialog appears, navigate to the place where you stored your “Dev” folder, click on it and click “Select Folder”.

diymenu03

Now you should see a new item appear on your Start Bar with the word “Dev” (or whatever you named your menu). Here you can see my menu; I’ve highlighted the “Directories” submenu so you can see it working as well.

diymenu04

If the menu doesn’t appear where you want it simply click on the little bar to the left of the name of the menu and drag it where you want. Your menu may also appear but “spread out”. If so, simply place the cursor over the bar, and drag it back into a collapsed position as I demonstrate below.

diymenu05

You can create as many of these little do it yourself quick launchers as you want. I usually have my Dev menu all the time, which holds my generic shortcuts or shortcuts to general items such as my RSS reader, Visual Studio, or Paint.Net. When I’m working on a big project, I like to create shortcuts specific to that project. Thus I’ll create another one for that specific project that will open the folders where my source code or data is stored, has links to open the project right in Visual Studio, and more. They are easy enough to take off the Start Bar, simply right click on the menu again, go back to Toolbars, and click on the menu name. It will remove itself from the Start Bar, but the folder will remain intact for when “phase 2” of your project comes around.

Using my “Do it yourself quick launch menu” I almost never need to go through the Start Menu. In addition it allows me to keep my Quick Launch toolbar extremely small, I only have icons there to apps I really do use many times a day. And the best part is it’s all built into your copy of Windows already. Nothing to download, install, no additional overhead, totally safe and secure. This is a real benefit when you work in an environment where you are not allowed to install any third party applications. Give it a try and see if you don’t find it a better way to work.

TouchCursor 1.3 Released

If you’re not familiar with TouchCursor, it’s a great utility for turning the “home” keys (keys like i, j, k, l, etc) into up arrow, left, down, right, etc. For my initial review, see my post at https://arcanecode.wordpress.com/2007/05/11/arcane-software-touchcursor-for-us-keyboard-geeks/

Now, I have an incredible story of customer service to share. Late last Saturday night I was on the forums on Scott Hanselman’s site ( http://www.hanselman.com/forum/ ) and was having a ‘conversation’ with someone in the Productivity Tools area on TouchCursor. I wondered aloud how hard it would be to change the activiation key from the spacebar to something user assignable. So I shoot off an e-mail to the support site and head off to bed.

When I wake up Sunday, I have an e-mail from the author saying he didn’t think it would be all that hard, it’d be more work getting all the help updated. I thanked him and since I’d made the suggested offered to do any beta testing. And off I went thinking it’d be a while.

I get home from work Monday, to find an e-mail with a link to the Beta version of TouchCursor! Gleefully I download and test away, finding no issues and trying a variety of activation keys.

And what a list! Check this out, and this is just a sample:

touchcursor_activation_options

For now I’m trying caps lock as my activation key because I seldom use it, and it’s close to my pinky just between shift and tab. Seems the most natural so far. But to get back to my story…

I reported my results back, and on Wednesday morning got the e-mail the new version had been released! Talk about swift response.

Take a look for yourself, download the current version at http://touchcursor.com/ . It’s shareware, so you can try it before you buy, and buying is pretty painless, a mere twenty dollars (US). There’s even a “no install” version, in case you want to run it as a portable app from your USB drive.

TouchCursor has made it to the short list of must have tools in my arsenal. After service packs, virus protection and firewalls it’s one of the first things that gets installed. I challenge you to try it for 30 days and see if you don’t get hooked!

Standard Disclaimer: I have no financial association with Rare Pebble Software, other than having purchased the TouchCursor software. Just a very satisfied customer.

Arcane Links

Some miscellaneous topics to cover for today. First, I had the need to copy several thousand files from one machine to another, about 6 gigs worth. Explorer? No thanks, to slow and unreliable. Fortunately I had recalled reading a post on Scott Hanselman’s blog just the other day on this topic. http://www.hanselman.com/blog/XCopyConsideredHarmfulRobocopyOrXXCopyOrSyncBack.aspx

Since the machine I was using to do the copying was Vista, I used RoboCopy. Worked like a champ. The bad part was I didn’t even know I already had this tool until I’d read Scott’s post. Always nice when you go hunting for a tool only to discover you’ve already got it and it’s ready to go.


On the subject of SOA, Redmond Magazine released an article on Microsoft’s SOA strategy. http://redmondmag.com/features/article.asp?editorialsid=756

It was a long article and interesting, although it seemed to have an anti-Microsoft tone. I picked up a subtle, and perhaps condescending, knocking of Microsoft for not falling into lockstep with other industry players like IBM. While I do agree Microsoft sometimes comes a little late to the party, I don’t think it has to jump on the party boat to be an effective player in the industry.


Windows Communication Foundation Guru Jeff Barnes is planning on some new WCF posts in the near future, so be sure to keep an eye on his site if you play in the WCF realm. http://jeffbarnes.net/portal/blogs/jeff_barnes/archive/2007/08/08/coming-soon-wcf-3-5-posting-blitz.aspx

Jeff’s also working on a WCF Site (http://jeffbarnes.net/portal/blogs/jeff_barnes/archive/2007/08/06/planning-a-wcf-community-site.aspx), another good reason to keep an eye on his blog.


Finally, Scott Hanselman has opened up a forum area on his site, some good info and discussions can be found here. http://www.hanselman.com/forum/

DVD Burning Under Vista: Grab & Burn

As much as I’ve enjoyed Vista, the one area I haven’t enjoyed is the DVD burning capabilities. They require an amount of empty disk space equal to one DVD. Usually by the point I need to burn a DVD it’s because my drive is full! Further, it’s slow, and not real friendly. As such I began a quest for an app that would let me burn DVDs / CDs under Vista, and was inexpensive. After a lot of searching I found just the tool.

grabburn

Grab & Burn from RocketDivision ( http://www.rocketdivision.com/download_grabandburn.html ) has flavors for both Linux and Windows. It uses a wizard interface to step you through all of the various tasks. You can create an ISO, or burn a disk from an ISO, or take files and burn directly to disk without going through the ISO step. It also doesn’t require you have a lot of empty disk space, a critical thing for someone like me who often fills his drive up before he realizes it.

In addition to the file burning abilities Grab & Burn also has some interesting copy abilities. It will do a standard disc copy, a handy feature. When I burn my photos to a disc, I always burn two copies, one for my wife and one to leave at work as an “off site backup”. Family members also wind up getting copies at some point.

It also has the ability to convert 8.5 gig DVDs down to 4 gig ones by removing things like menus and extras. It also says it can master new DVDs out of your videos and the like.

To be honest I have not yet tried these last two features, I’ve been thrilled with the basic capabilities of being able to create data disks so quickly and easily.

Best of all, RocketDivision is giving the software for free, so the price is perfect. It’s easy to install, light weight, and fast. Even if you are already using another product consider downloading and checking it out. I’ve used it on both XP and Vista so far with great success.

Arcane Portable Passwords

After a long time searching, I finally found a password manager I like. I’ve looked at quite a few, but for whatever reason never seemed to find one that suited me. Today I finally found KeePass and am happy.

KeePass ( http://keepass.info/ ) is a free, open source password manager. It has the same basic functionality that most password managers have, but laid out in such a manner that to me is easy to use. It will generate a complex password for you, or you can enter your own. It even has a meter, which measures the strength of your password.

Be warned I had some issues with the installer version of KeePass under Vista. However, it also has a standalone no-install version which you can download and use, which is what I did. It works like a champ under Vista.

It also has a version (http://portableapps.com/apps/utilities/keepass_portable ) that integrates nicely with Portable Apps ( http://portableapps.com/ ). In case you are not familiar with Portable Apps, it’s a suite of tools that don’t require installation.

The idea behind portable apps is you can place all of them on a USB thumb drive or external USB Hard drive. Then no matter what machine you plug it into, all off the apps and settings go with you. Nothing is stored on the host PC.

There are versions of FireFox, OpenOffice, GIMP (the paint program), and of course KeePass. Much more too, so take a look. Great for someone who travels a lot and just needs a few simple apps on the road.

Arcane Tools: Cropper

Well, the uber cool Scott Hanselman has done it again, found another gem. OK, he’s been using it for a while, but in watching his GrokTalk ( see my post on Tuesday ) I learned about Cropper.

Cropper is a screen capture tool. As you can see below, it puts an translucent window on your screen. You can move and resize this window with the mouse, or the keyboard.

[Pic of Cropper in action]

The arrow keys will move the cropper window in 1 pixel increments for fine tuning, or for quick moves combine the arrows with the CTRL key to make 10 pixel jumps. You can also resize, use ALT plus the arrows for 1 pixel resizes, or CTRL+ALT+arrow for 10 pixel resizing jumps.

You have the option to save in a variety of formats, including BMP, PNG, and JPG, and can even select a level of JPG compression. You can also save to the clipboard if you so desire.

To capture an image, simply double click on the translucent cropper window, or press ENTER. When you do, a file is written to your Documents folder in a subfolder called Cropper Captures (although this is user configurable). I like this, as it lets me quickly grab one screen shot after another without having to put a lot of thought into it.

The coolest thing about Cropper though, is it’s entirely written in C#, and open source so you can see all the code. It comes courtesy of Brian Scott, you can see his blog and download Cropper for yourself at http://blogs.geekdojo.net/brian/articles/Cropper.aspx .

The only negative I’ve found is the name. Apparently cropping is also a popular term in the scrapbooking world, so when I started talking about cropper my wife ( http://southerntinkerbelle.com ) got all excited and tought I was getting into scrapbooking! I hated to disappoint her, but on the bright side the sofa really wasn’t all that uncomfortable.

Arcane Holiday

Today in the US we are celebrating Memorial Day, where we remember all of the soldiers who fell in battle. So let me first start by thanking the families and those men who sacrificed themselves for the greater good.

In keeping with the holiday theme, I thought I’d take a brief holiday from the Windows Services series and catch up on a few things.

First, there’s been an update to my favorite Windows add-on, TouchCursor. The new version fixes the issue I mentioned with Virtual PC’s. The only issue since I’ve run across is in using it with Visual Studio and DevExpress CodeRush add-in. CodeRush also wants to use the spacebar for activation. However, I was able to easily change the activation key from CodeRush to something else, and problem was solved. Check it out at http://touchcursor.com/ or see my initial review at http://shrinkster.com/pf4 .

Next, about a week ago I mentioned some great music to program to by a group called Midnight Syndicate. Shortly after posting I found out the Haunted Voices Radio podcast did an entire weekend of Midnight Syndicate, including playing their music and complete interviews. Check out Haunted Voices Radio at http://www.hauntedvoicesradio.com/modules.php?name=Content&pa=showpage&pid=6 or http://shrinkster.com/pf2 . Each banner ad is to a separate MP3 (the weekend was broken up into 2 hour chunks for easy downloads). I believe there are 17 in all.

Finally I have to confess to a guilty pleasure. I recently received a gift certificate to a book store, and used it to purchase “Windows Developer Power Tools” by James Avery and Jim Holmes. (Amazon link: http://shrinkster.com/pf5 )

If you’ve been reading my blog for a while you know I’m a “tool freak”, I love add-ins and tools for Windows and Visual Studio. As such I’ve been wanting this book for a while, but since I’ve already got a huge stack of books I’m still reading through I was having problems justifying yet another book. The gift certificate gave me just the opportunity I needed to get this cool new book. At over 1200 pages it’s chock full of toys, can’t wait to dig in!

Arcane Fun Friday

Just thought I’d share a bit of fun today, I’ve found a cool website called InterfaceLIFT. (http://interfacelift.com/). It has wallpapers, icons, themes, etc to enhance your system. You can specify the size of wallpapers, and it includes sizes for the oddball laptop screens like mine, 1440×900. If you are looking for a way to spice up your install, or just get a few really nice looking wallpapers, this is a great resource, and even works with Vista!

IE Developer Toolbar Released!

After a long beta, Microsoft has released the IE Developer Toolbar. This toolbar allows you to look at the DOM (Document Object Model) in depth. You can delve into the CSS in detail as well. Take a look:

[Picture of IE with toolbar activated]

First you need to install the toolbar, you can download it from http://www.microsoft.com/downloads/details.aspx?FamilyId=E59C3964-672D-4511-BB3E-2D5E1DB91038&displaylang=en or http://shrinkster.com/ozm.

After installing, launch IE, I’m using IE7. Select Tools, Toolbars, Explorer Bar, IE Developer Toolbar to open the toolbar inside IE. You’ll see more features than I can cover here, just start playing with a webpage.

Here I’ve got this blog open, and clicked on a header element in the DOM tree. You can see a blue outline at the top of the picture (look at the dark blue next to “Arcane Code”). That’s the IE Dev Toolbar highlighting the element you just clicked on.

If you are doing serious ASP.Net development, this tool will be invaluable for working out the coding to make your website look it’s best. And it’s free, so you’ve got no excuses!

Arcane Software: TouchCursor – For us keyboard geeks!

I hate to sound like an advertisement, but I recently found some software that absolutely rocks and I just have to share. I have to confess that I’m a “keyboard freak”. I hate having to take my hands off the keyboard, so much so that I bought a Lenovo keyboard with the touchpoint mouse cursor to use on my desktop, just like what you’d find on an IBM Thinkpad.

Now I’ve found some software that even further reduces the number of times I have to move my hands away from the home position to reach for those awkward keys, such as the cursor keys. It’s called TouchCursor, available at http://touchcursor.com.

What they do is use your space bar like another shift / ctrl / alt key. They then combine the space bar with the letter keys to emulate the odd keys like cursor, page up, etc. For example, space bar + I moves up one line. Space bar + K moves back down, space bar + J moves left, and so on. Here’s the default mapping (graphic courtesy of their site):

This is wonderful stuff, no longer do I have to move my hands off the “home” position to move the cursor around. And even better, the software is completely configurable. I can change the key combos to anything I want, and even add new ones.  It also works perfectly with existing key combos like ctrl, shift, and alt. For example, SHIFT + SPACEBAR + L is the same as SHIFT + RIGHT ARROW.

Now, you may think “well what if I have that odd program it doesn’t work right with?” No problem, the software allows you to turn off the functionality for specific applications. For example, I found it behaving a bit oddly with Virtual PC sessions (probably had something to do with both the guest and host OS wanting to look at the keyboard), so I disabled it for Virtual PC and just run it inside the VPC guest. Or you can take the reverse tactic, and only enable it for certain apps.

It really looks like they have thought of everything, all the little tweaks you might want to do with the software are available for you to do. I’ve been testing this with both Vista and XP and it works great on both platforms.

TouchCursor is shareware, you can download a copy and try it out for 30 days with no nag screens or any other crippling feature. The cost is only 20 US Dollars though, well worth the investment (I just sent in my 20!). For your money you get tech support, lifetime upgrades and permission to run on all of your computers. Not to mention the good feeling of helping out a worthwhile product. All that for 20 bucks? Count me in.

This is a really creative solution for increasing productivity at the keyboard. Rarely do I fall in love with a piece of code, but this product has made my very short list of “must have won’t operate a computer without it” software. I highly recommend trying it out, and using it for the full 30 days. It does take a little getting used to, but once you get the hang of it you won’t want to operate a keyboard without it!

Standard disclaimer: I have no financial affiliation with Rare Pebble Software, the folks who make Touch Cursor, other than being a customer. I receive no consideration of any kind for this mention. I just think it’s some awesome software and wanted to share.

PS Sorry for no post yesterday, it was a business travel day and I got home much later than I anticipated.

Arcane Tricks: Cut / Copy / Paste To and From Virtual PC

As you might guess from my various posts, I like using Virtual PC. It has one annoyance, you can’t cut / copy / paste between the Virtual PC and another machine, like the host operating system.

This is actually a good thing, as it’s a security feature. It allows you to test suspicious software safely, without fear of it damaging your host. There are times though, when you know it is safe to allow the cut / copy / paste connection between your Virtual PC and your host. It would be nice to have a switch or option that turns this on and off. Sadly, it’s not there.

There is a work around though. Back in December, I talked about the combination of Virtual PC and Remote Desktop. (https://arcanecode.wordpress.com/2006/12/06/arcane-combinations-virtual-pc-and-remote-desktop/ or http://shrinkster.com/mvq) . While VPC lacks the ability to cut / copy / paste, Remote Desktop does not. Using Remote Desktop you can cut, copy, and paste data from your host (or any other remotely controlled PC) to the Virtual PC you are controlling via Remote Desktop.

All you have to do is follow the instructions in the post mentioned above, and “remote” into the virtual machine. Yes, you will be remoting to a machine running on the same box, but all the remote desktop software sees is an IP address. It can’t tell if that IP is on the same host computer or one across the planet.

This little trick has saved me several times, and was one of those “doh!” moments when it first occurred to me. Even if you have been following along and using Remote Desktop with VPC, it may not have occurred to you to use it on the same machine.

Resources

Allowing Remote Desktop Access to Windows XP, Step by Step

Way back in October of last year (https://arcanecode.wordpress.com/2006/10/09/remote-desktop-connection/ or http://shrinkster.com/mvr) I wrote about using the Remote Desktop tool.

A few people have had problems accessing their desktops, so I thought I’d provide some step by step instructions on how to allow your computer to be access via Remote Desktop.

First, open Control Panel.Then, open the User Accounts.

Click “Change the way users log on or off” and uncheck “Use the Welcome screen”. Click Apply Options.

[Picture of User Acct Screen]

Click on your account, and make sure it has a password. If not, click “Create a password”, then create one.

Close out the user accounts, then close out Control Panel.

Right click on the “My Computer” icon, and pick Properties.

Select the “Remote” tab.

Check the box on that reads “Allow users to connect remotely to this computer”.

[Pic of System Properties Remote tab]

Click Apply and OK, and you should now be able to access your computer via Remote Desktop. Just follow my instructions in the post I mentioned at the beginning of the message and you should be in good shape!