Introduction
In this, the third post on using VeraCrypt from the command line, we’ll cover how to use VeraCrypt from Linux, specifically Ubuntu 20.04.
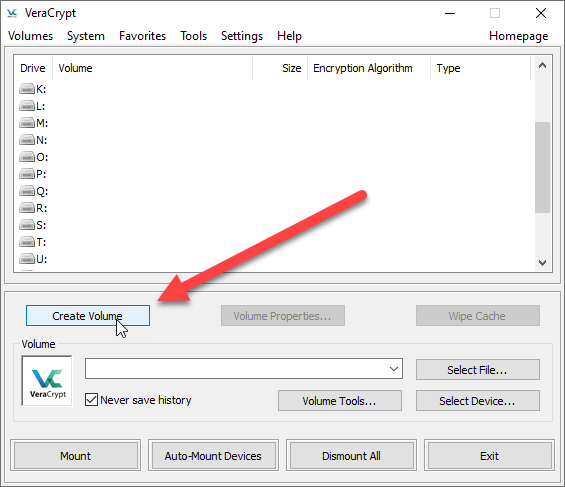
We’ll cover the basics. Creating a container, mounting a container (aka volume), getting a list of mounted volumes, and finally dismounting your volumes.
As I stated in previous posts, the command line syntax is a bit different for all the major operating systems. In this post we’ll focus on Linux.
Prerequisites
Before you install VeraCrypt, you should be aware it has a dependency on the libwxgtk3.0-gtk3-0v5 library, so we might as well install that first. From the terminal execute these commands.
sudo apt-get update -y
sudo apt-get install -y libwxgtk3.0-gtk3-0v5
Next, in order to format a volume as exFat so it can be used across platforms, you’ll need to install the exFat tools.
sudo apt-get install -y exfat-fuse exfat-utilsNow you’ll need to install VeraCrypt. I went to https://veracrypt.fr/en/Downloads.html and scrolled down to the Linux area. In the Ubuntu 20.04 area, I downloaded veracrypt-1.24-Update7-Ubuntu-20.04-amd64.deb file into my Downloads folder.
In the terminal, I moved to my Downloads folder then issued this command to install it:
sudo dpkg -i veracrypt-1.24-Update7-Ubuntu-20.04-amd64.debFrom here I went into Ubuntu’s menu and launched VeraCrypt to validate it installed correctly.
Code Samples
While I will be providing samples here, you should also check out the project I have on GitHub that goes with this post, https://github.com/arcanecode/VeraCrypt-CommandLine-Examples
I’ll update it over time as needed, and it may be easier for you to download, or cut and paste from it.
OK, let’s get started!
Creating a Container
Before we begin I’d like to make two notes. First, I’ll be storing the container in my Documents folder. So in the terminal be sure to cd into your Documents. This will make it easier as we won’t have to specify full paths to our files.
Second, included in this demo is a randomdata.txt file. We’ll explain its use shortly, but you’ll need to copy this file into Documents as well, or when the time comes include the full path to it.
Let’s start by looking at the long line of code needed to create a container. Please note that while your blog reader may wrap the command below, it should be one line in your shell script or from the command line.
sudo veracrypt --text --create vctest.vc --size 200M --password MySuperSecurePassword1! --volume-type normal --encryption AES --hash sha-512 --filesystem exfat --pim 0 --keyfiles "" --random-source randomdata.txtOK, that’s a bit hard to read, so let me break it out into each part below.
The first item is the veracrypt command, assuming you installed it in the default location. By default VeraCrypt installs in /usr/bin, but because /usr/bin is in the path you don’t have to specify it when calling VeraCrypt. You do though, need to use all lowercase as Linux is case sensitive. In addition you’ll need to call it using sudo.
sudo veracryptThe --text parameter says we want to use VeraCrypt in text mode, not GUI. Note, the --text parameter must be the FIRST parameter you pass in, or it will not work.
--textWe next tell VeraCrypt we want to create a new file container, and where it is to be stored at. For this demo, I’m just going to use the Documents directory. Be sure to cd into this folder from the terminal command line before issuing the full command. Otherwise, you can specify the full path to the .vc file you want to create.
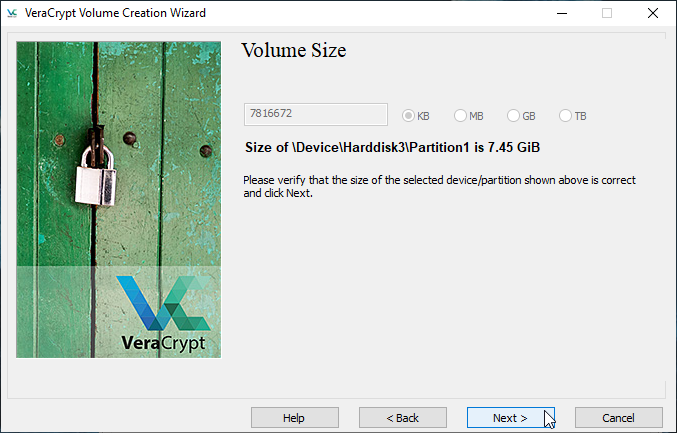
--create vctest.vcNext we indicate how big we want our container to be. If you just list a number, VeraCrypt assumes you mean bytes, but you can also affix M for megabytes, G gigabytes, K kilobytes, and so on.
Here I’m going to keep it small for demo purposes and use 200 megabytes.
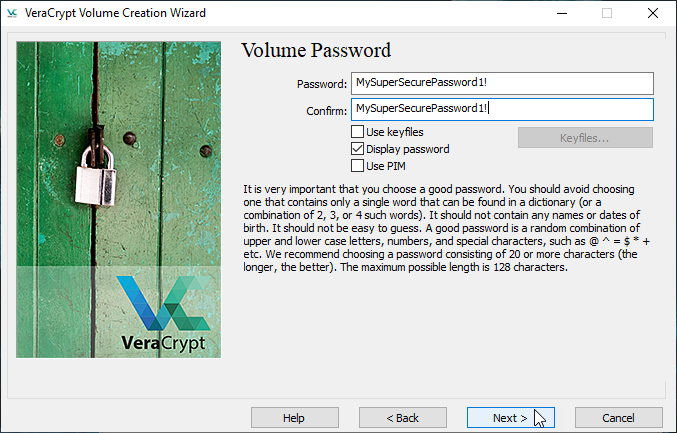
--size 200MNow we provide our password. Normally you would not want to hard code it, but rather pass it into your script as a parameter.
I wanted to keep this demo simple though, and focus on VeraCrypt so I’ve just hard coded it. I’m using the same “super secure” password I’ve used in my last few posts.
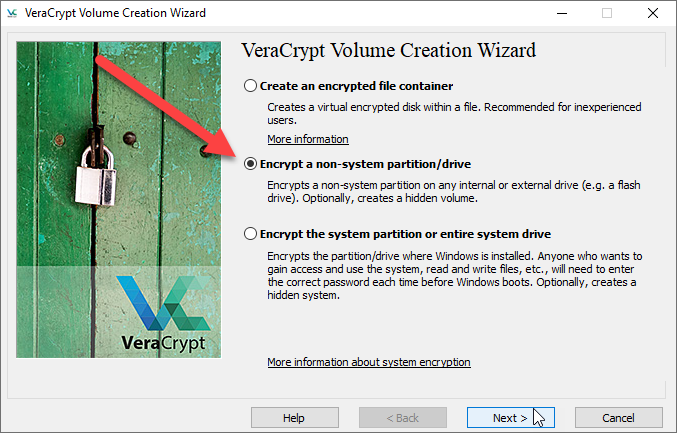
--password MySuperSecurePassword1!Next is the volume type, normal or hidden. In a previous blog post I cover hidden types, and if you are going to do a hidden volume I would suggest using the GUI in order to assure it is done right.
For this demo we’ll go with a normal volume.
--volume-type normalNow we pick the encryption type. There are quite a few, so refer to the VeraCrypt documentation for a full list. Here we’re using AES.
--encryption AESNext up, for the encryption method we picked it needs to know the hashing algorithm. For AES I suggest SHA-512.
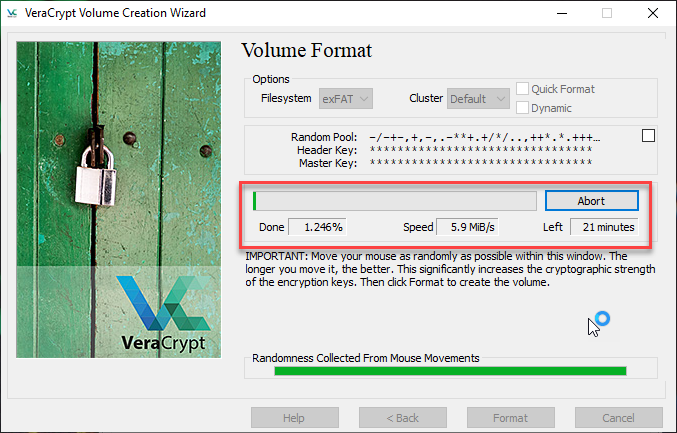
--hash sha-512In order to keep this container portable across other OS’s (Windows and macOS) we’ll format using exfat. In order to format as exFAT, you’ll need to have installed the exFAT utilities on your system (see the Prerequisites section above).
--filesystem exfatThe PIM is a special number that allows you to specify the number of times hashing algorithm executes. It’s a bit more complex than that, if you want full details see the VeraCrypt documentation.
For now, we can pass it the value of 0 (zero), which tells it to use the default value for the PIM.
--pim 0You can mount a volume in VeraCrypt using a keyfile, as opposed to a password. We’ve not done that here, so we’ll just pass in an empty string to indicate we won’t use a keyfile.
--keyfiles ""As a final parameter, you need to provide random data for VeraCrypt to use when generating its hashes. It needs at least 320 characters, but you can give more.
I’ve provided a sample one as part of this demo (see the GitHub code samples), I just picked up my keyboard and randomly smacked myself in the head until I got around 350 characters. I’d suggest creating one of your own for production, but for just testing and learning (I’m assuming you’ll throw away the vault when you are done) then the one here will be OK.
As stated in the beginning of this section, either copy the randomdata.txt file into the folder where you are executing the commands from, in my case the Documents folder, or specify the full path to it in the command line.
--random-source randomdata.txtOK, that’s everything you need to create a volume. Just run the command, or execute the script. Now that it’s created, let’s mount it.
Mounting a VeraCrypt Volume
Here is the full command line to mount. (As before, it should be on a single line, ignore any wrapping done by your browser).
sudo veracrypt --text --mount vctest.vc /mnt --password MySuperSecurePassword1! --pim 0 --keyfiles "" --protect-hidden no --slot 1 --verboseLet’s start breaking it down. First, as before, is the call to the VeraCrypt app.
sudo veracryptAs with all of these commands, the --text parameter must come first to let VeraCrypt know we want to use text mode and not the GUI.
--textThe mount parameter actually has two values that need to be passed in.
First we pass in the name of the file to mount.
Second we need to provide a mount point. This will let Linux treat it like any other drive you might plug in. In this example we will use /mnt.
--mount vctest.vc /mntUsing /mnt works fine if you only have one volume to mount. If not, you’ll have to create new mount points. This is pretty easy.
sudo mkdir /media/vc2Placing these in the /media area is a common practice. From there you can name it anything you want. You could use vc followed by the slot number, or use the name of the file.
Then in your script, you can use:
--mount vctest.vc /media/vc2Note that once you create the directory under /media it is persistent, you don’t have to create it again. This does mean your /media will accumulate these mount points over time. Once you are sure you’ll no longer need them consider using rmdir to remove them.
You could of course use /media for all your volumes, and avoid using /mnt completely. Just be aware you’ll have to create a name under /media first.
Next is our “super secure” password. If your password has spaces, you’ll need to wrap this in double quote marks.
--password MySuperSecurePassword1!If you overrode the default PIM when creating your volume, you’ll need to provide it. Otherwise, we can pass it the value of 0 (zero), which tells it to use the default value.
--pim 0If you created your volume using a keyfile or files, provide them here. Otherwise, you can just pass in an empty string to indicate no keyfile is needed.
--keyfiles ""If this volume contained a hidden volume, you would need to let VeraCrypt know by using a value of yes, plus some other parameters.
In this case there is no hidden partition in our volume, so we can just give a value of no.
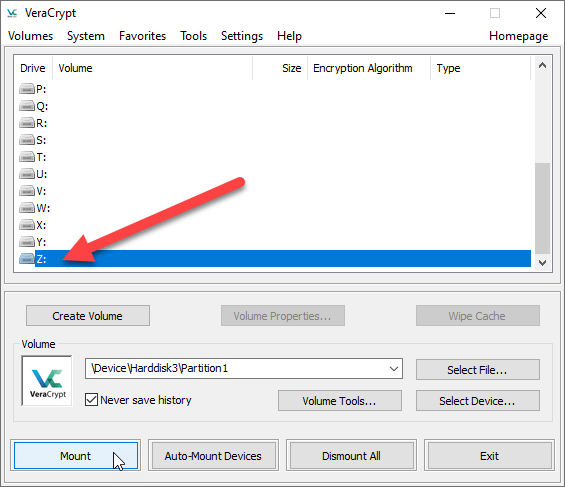
--protect-hidden noOPTIONAL – Slot
Slot is an optional parameter. If you look at the VeraCrypt, down the left side are a series of slot numbers. If you omit this parameter, VeraCrypt will mount in the first empty slot.
However you can specify a slot, which can be useful if you want to make sure certain volumes always mount in a specific slot. You can then use the slot number when you want to dismount your volumes.
--slot 1OPTIONAL – Verbose
Verbose is also an optional parameter, but I often include it just to see what is going on under the covers. You can use it with any of the commands in this post, I just included it on this one for example purposes.
If you intend to make this into a script then I would suggest omitting it once your script is debugged and working.
--verboseOK, hopefully all is going well, and you’ve created and mounted your volume. Let’s next see how to get a list, from the command line, of all your mounted volumes.
Listing Mounted Volumes
Here’s the command line to see what is mounted on your Ubuntu computer.
sudo veracrypt --text --listAs with other commands you have seen, we start by calling the VeraCrypt application. We then use --text to let VeraCrypt know not to use the GUI.
We finish with --list, which tells VeraCrypt to display a list of all mounted containers. This will include the slot number, volume name, and mount directory.
If you’ve been following along, then running the list should produce an output like:
1: /home/arcanecode/Documents/vctest.vc /dev/mapper/veracrypt1 /mntOf course your folder will have your username, not arcanecode.
Mom always taught me to put away my toys when I was done playing with them, so in the next section we’ll see how to dismount your volumes once you are done with them.
Dismounting VeraCrypt Volumes
There are four ways to dismount a volume. Three of them will dismount a specific volume, the final will dismount all volumes.
All methods follow the same pattern. Run veracrypt using sudo, followed by the --text parameter to tell VeraCrypt not to launch the GUI.
Finally we give the --dismount to let VeraCrypt know we want to unload our volume. The value passed into the --dismount parameter varies, and will be explained below.
Method 1: Slot Number
sudo veracrypt --text --dismount --slot 1With the first method, you provide the slot number. If you mounted a volume and used the slot number parameter, for example your personal file vault is always in slot 5, then this can be an easy way to dismount.
On the other hand, if you let VeraCrypt load in the first available slot, you’ll either have to look at the GUI, or run the list command in the previous section, to learn the slot number.
Be aware there is no requirement to load slots in sequential order. Your first mount could go into slot 5, the second into slot 7, and third into slot 10, leaving the other slots empty.
Method 2: Mount Directory
sudo veracrypt --text --dismount /mntOr if you created it under /media, it might look like:
sudo veracrypt --text --dismount /media/vc2Using the volume list command or looking at the “Mount Directory” column in the GUI, you can pass in that value to dismount. Because you may not always use the same mount point on all systems to mount, it can be of an issue trying to be reliable in dismounting the right volume.
Method 3: Volume File Name
sudo veracrypt --text --dismount vctest.vcAlternatively you can use the full path to the volume.
sudo veracrypt --text --dismount /home/arcanecode/Documents/vctest.vcThis method is the most reliable. Since you know the name of the file you mounted, you can just provide the same file name to dismount.
VeraCrypt doesn’t care what slot it is loaded into, it uses the file name to find it.
The winner – Method 3!
For the reasons above, I highly suggest Method 3 be your go to method for dismounting volumes in your scripts. It is the most reliable, and easiest to understand when looking at the scripts.
But wait, there’s more!
Dismounting ALL Volumes
There is one final method, you can dismount all of the VeraCrypt volumes you have mounted.
sudo veracrypt --text --dismountIf you use just the --dismount parameter, and pass in no values, then VeraCrypt will attempt to dismount ALL volumes you have loaded.
This can be a useful command to run when you’re shutting down your computer, to ensure all volumes are properly shutdown.
If you don’t have any volumes mounted, then VeraCrypt basically shrugs it’s shoulders, does nothing, and ends.
Conclusion
In this post, we learned how to create, mount, and dismount VeraCrypt volumes from the command line in Linux, specifically Ubuntu. In addition, we also saw how to get a listing of volumes currently mounted.