More OOP: Interfaces in C#, Part 1

During our discussion on OOP (see my posts for the last few days) one of the key concepts was the base class. The base class was a place where we could put code that would in turn be used by the classes that descend from the base.

The use of the base class allows us to take advantage of polymorphism, the ability to treat a lot of specific child classes as if they were the same less specific, more generic type (the base). Notice a point I made a moment ago. The base class contains code, that will be inherited.

What if you have a situation where you want a common base, but you don’t have any code that will be reusable by it’s descendants? Interfaces step in to fill the need.

One classic example given in every book is the Shape. You never have “a shape”, instead you have rectangles, squares, circles, triangles and more.

An example from the real world might be the concept of lunch. Every day my coworkers and I go out for lunch. Lunch has a common method called Eat, yet the implementation varies depending on the type of food we pick. With Mexican we can eat chips and tacos with our hands. For Oriental we use chopsticks. For Italian, better use that fork. We have the common concept of Eat, but the implementation for each food type is so different we probably won’t be able to share any code.

Implementing an interface in C# is not difficult. Drawing back on our Employee example from the last few days, let’s say in your company you wanted to define a new type called “Person”. You will never have a “Person” object, instead you will always create an Employee, Contractor, Volunteer, and the like. To implement this, let’s create a Person interface.

First, right click on your solution and select Add, New Item, and select Interface from the long list. Set the scope to public.  

using System;

using System.Collections.Generic;

using System.Text;


namespace OOPDemo

{

  public interface IPerson

  {

    string FirstName { get; set;}

    string Lastname { get; set;}

    string FullName();

  }

}


There’s several areas I need to draw your attention to. First, after public we used the keyword interface. This is the signal to the compiler that this is a declarations only, and has no code.

Next is the name, you see I put the letter I in front of Person. A long standing tradition is to name all of your interfaces with the letter I in front, and it’s a tradition I’d suggest you stick to.

Notice the FirstName and Lastname areas, this is how we declare there will be properties with a get and set. The FullName line is how we specify there will be a method with the name FullName. Note too there is no scope qualifier in front of any of the return types (in this case they are all string). Because this is an interface, all items must have a pubic scope.

Now we need to actually use the interface. Let’s modify our Employee class to implement the Iperson interface. All it takes is a modification to our class declaration.

  class Employee : IPerson


Indicating the Employee class will now implement the Iperson interface carries certain connotations. It means we must implement all of the properties and methods the Iperson interface declares. Since we already have FirstName, Lastname, and FullName we are in good shape. However, if we had not we would have to create those properties or methods we were missing.

Now, via polymorphism we can treat the Iperson just as if it were a base class. Let’s modify the ShowName method from yesterday to use an interface instead of a base class.  

    private void ShowName(IPerson per)

    {

      MessageBox.Show(per.FullName(), “ShowName Method”);

    }


This now makes the ShowName more functional for us. In the future, if we do implement a Volunteer or Contractor they too could be used in the ShowName method.

Using interfaces will allow you to further extend the power of polymorphism. In addition it gives you a way to create base classes in situations where you have no common code to put in the base.

Tomorrow: More on Interfaces.


Object Oriented Programming Pillar #3: Polymorphism

The third plank of OOP is a concept called Polymorphism. In my last post we went over Inheritance. Inheritance allows us to go from something generic, like an Employee, to something more specific, like a Manager or Peon. Polymorphism allows us to go in the reverse direction, treating something specific as something more generic.

Why would you want to do this? In our example, payroll would be a perfect example. Let’s first create our Peon class. We’ll also be using the Manager and Employee classes we have been using over the last few days.  

using System;

using System.Collections.Generic;

using System.Text;


namespace OOPDemo

{

  class Peon : Employee

  {

    public Peon(): base()

    {

    }


    public override string FullName()

    {

      string retval;


      if (base.FirstName.Length > 0)

        retval = base.FirstName.Substring(0, 1) + “. “ + base.Lastname;

      else

        retval = base.FirstName + ” “ + base.Lastname;


      return retval;

    }

  }

}


As you can see, Peon is pretty simple, I called the base constructor so I wouldn’t wind up homeless (see yesterday’s comments) and overrode the FullName method just because I could.

Now what we want is a routine that will call a method common to every Employee object. Here’s one I whipped up.  

    private void ShowName(Employee emp)

    {

      MessageBox.Show(emp.FullName(), “ShowName Method”);

    }


In the real world, we would probably be doing something here like call a “PayEmployee” method. PayEmployee is something we would do for all employees, regardless of whether they are a manager or a peon. For this example I’m just calling the FullName method, since we’ve been using it the last few days. Now we need to create our various objects and pass them to ShowName.


      Employee emp1 = new Employee();

      emp1.FirstName = “Carl”;

      emp1.Lastname = “Franklin”;

      this.ShowName(emp1);


      Manager mgr1 = new Manager(); 

      mgr1.FirstName = “Richard”;

      mgr1.Lastname = “Campbell”;

      this.ShowName(mgr1);


      Peon peon1 = new Peon();

      peon1.FirstName = “Mark”;

      peon1.Lastname = “Miller”;

      this.ShowName(peon1);


Here you can see I’ve created one Employee, one Manager, and one Peon object. But I can pass all three of them to the same ShowName method and treat them like Employees. Why? Because they are all descended from (or are) the Employee class. Polymorphism makes all this work.

You should note something very important here. If you actually run the program, you’ll see the following message boxes appear, in this order:

[Pic of Employee FullName]

ShowName with Employee

[Pic of Manager FullName]

ShowName with Manager

[Pic of Peon FullName]

ShowName with Peon


Do you see it? Even though within the ShowName method we are treating everything like an Employee, the compiler was smart enough to know they were not all Employees. Instead, it called the overridden method in the child class (Manager and Peon), not the one in the base class. This behavior is very important to understand. On one hand, it’s what makes Polymorphism so powerful, but if you are not expecting it, you can get bit.

Because this can get confusing, let’s see if I can relate this to a real world example. I have a wife and two daughters. Their base class might be “family member”, but their specific classes are wife (Ammie), daughter 1 (Raven) and daughter 2 (Anna).

On days where I might work from home, I can send family member a message (i.e. yell) “get daddy a Jolt cola”. The base implementation is open refrigerator, get soda, bring to daddy (that’s me). My wife Ammie just uses the base implementation of the “get daddy a Jolt cola” method.

My oldest daughter, Raven isn’t quite tall enough to reach the sodas on the top shelf, so she has to override the “get daddy a Jolt cola” method by adding a step to stand on a stool so she can reach them.

My youngest daughter, Anna is even shorter still, so her override calls for her to stand in a chair in order to reach the soda.

Now, in all three cases I simply call the “get daddy a Jolt cola” method of the “family member” object. When the individual object (Ammie, Raven or Anna) executes the “get daddy a Jolt cola” method, they each use their individual implementation to do so.

So where are some situations where Polymorphism would come in handy? Yesterday you may recall I said my classes in my Database Layer (often referred to as the DL) all descend from a common base class.

Within my program then, I can take all of my database objects and pass them into a “CloseConnection” method. The CloseConnection method does what it says, closes any database connections before exiting the program. Because of Polymorphism, it doesn’t matter what type of data object I’m dealing with (Purchase Order, Employee, Work Order, etc) they all need to close, and this lets me do it in an easy, consistent manner that’s easy to update and maintain.

Another real world example: I created a special combo box control to which I added some additional features. My new combo was descended from the standard combo box in the toolbox.

I then turned around and created four new combo boxes from my special base class combo. Each one was bound to a specific type of data, and I used these over and over in my application. Each one though had some common methods, such as Load and Reset.

When my form loaded, I passed each combo box to a method to load them. All this method did was called the load method for each box, and because I’d overridden the load method it called the correct Load for each type of combo box.

Over the last few days I’ve written on the basics behind Object Oriented Programming, using C# to demonstrate. You should understand I’ve only scratched the service as far as power and flexibility go, OOP is a big subject. But hopefully what I’ve discussed here will serve as a starting point for your OOP journey.

Object Oriented Programming Pillar #2: Inheritance

The second pillar of OOP is Inheritance. But if you read the title of today’s blog, you probably already guessed that. Inheritance allows us to both reuse and extend code, plus allow you to easily make changes to a class and have them ripple through to the decedents.

Take a look at the Employee class from yesterday. When I think of employees in a company, I can think of at least two kinds, Managers and Peons (like me). Both are types of employees, but both have some things different. Inheritance allows us to reuse the best parts of employees, but add special functionality as well.

Let’s create a new class, called Manager. Here’s what I coded:

using System;

using System.Collections.Generic;

using System.Text;


namespace OOPDemo

{

  class Manager : Employee

  {

    // Constructor, call the base

    public Manager(): base()

    {

    }


    // Meaningless work, just like a real manager would do.

    public void MakeHairPointy()

    {

      string myPointyHairOrder = “Write me a program by last week.”;

    }


  }

}


The first thing you may notice is the : Employee after the class Manager. This tells the compiler that the Manager class is descended from the Employee class. Any methods, properties, and events available in the Employee class are now automatically available in the Manager class.

Next you see a line that says public Manager(). This is the constructor for the class. In here you can put code that you want to execute when the class is created. Perhaps this is setting some defaults for class variables, creating other classes, or a variety of other items. I don’t need to do anything, so I’ve just left it blank.

After the Manager() you see the : base() construct. This tells the compiler “hey, before you run the constructor in Manger, go run the constructor in your base class, employee, then come back and run the Manager’s constructor”. Even though I don’t currently have any code in Employee’s constructor, one day I might. Plus if I’m following good encapsulation then I don’t know whether or not Employee has a constructor, nor do I care.

Using the base() keyword is not only common practice but a good idea. If you don’t, you’ll likely wind up on the side of the road, homeless holding a sign that reads “Will code() for food;”.

Enough on constructors, let’s look at a sample that uses our new Manager class.  

      Manager mgr1 = new Manager();  //Constructor runs here!

      mgr1.FirstName = “Arcane”;

      mgr1.Lastname = “Code”;

      mgr1.MakeHairPointy();

      MessageBox.Show(mgr1.FullName(), “Manager FullName Dialog”);

Even though you won’t find them in the code for the Manager class, you see I am calling FirstName, LastName, properties and the FullName method. The Manager inherited these from Employee.

Imagine you had not one or two types of employees, but fifty? Then imagine your boss wanted you to make a change to the FirstName property, so that if the length were only one character it automatically put a period at the end of the first name? Now you begin to see the power of inheritance.

You make your change to the Employee class, which is known as the base class. Recompile, and you are done. That change is automatically reflected in all of the child classes that inherit from the base Employee class.

What if you have a situation where you want to implement something in the base class in a slightly different way? You have the power to override the base classes implementation of that method. That’s a fancy way of saying you can create a method with the same name in your descended class, with your new code. But there’s a big “if” you need to know about. (Isn’t there always?)

When you create a method in a base class, you must use the virtual keyword in the method declaration. This flags the compiler that it’s OK to override in child classes. Without the virtual keyword, the compiler will produce errors and fail. So let’s fix our employee classes FullName method so we can override it later.  

    public virtual string FullName()

    {

      string returnValue;

      returnValue = _firstname + ” “ + _lastname;

      return returnValue;

    }


All that was really needed was to slip the virtual keyword between the scope and the return type. Now we are ready to rewrite this method in our Manager class. 


    public override string FullName()

    {

      return “Oh great one “ + base.FirstName + ” “ + base.Lastname;

    }


Now when I run my code, I will see the rewritten FullName for the manager appear.


[OOP Demo 2 Picture]


Note too the use of the base.FirstName and base.LastName. Through the keyword base, you can access any of the non-private properties and methods of the base class. I could just have easily have done:


    public override string FullName()

    {

      return “Oh great one “ + base.FullName();

    }


If you take some time to plan your code architecture (see my post https://arcanecode.wordpress.com/2007/02/07/arcane-thoughts-the-passion-of-the-programmer/ or http://shrinkster.com/lvw) you can probably come up with many good relationships where you can go from abstract to something more concrete.

A real world example, in my database layer I descend all data handling classes from a base class that has common properties / methods such as the connection string and a connection object. This lets me write the connection “goo” once and use it over and over.

Don’t forget that at their heart, forms and toolbox items are classes as well, and you can inherit from them. A common technique is to override all of the common controls and use your version in your applications. The technique is slightly different so I will defer discussion on inheriting graphical stuff until another day.

A classic story I heard on DotNetRocks (http://www.dotnetrocks.com) is the lead developer who gets a call three days before their 300 form application is due to go to production. “Oh by the way” says the customer, “we forgot to mention it but it’s a requirement that all text boxes force their letters to uppercase.”

Even though they had not tweaked the text boxes previously, they had still made a decision lo those many months ago to inherit from the base text box and use the new one in their project. Because of that, they made a quick change to one routine in their custom text box, and all 300 forms were fixed in less than half an hour.

Inheritance can be an incredibly powerful tool when used correctly, but as my favorite hero Spider-Man used to say, “with great power comes great responsibility”. Make sure your inheritance chain is well thought out, lest you feel trapped in a spider’s web of your own making.

Object Oriented Programming Pillar #1: Encapsulation

I was working with an IT person who was new to .Net and Object Oriented Programming (OOP). Since these were new concepts to my coworker, I thought they might be new to others as well and as such thought it’d be a good idea to spend a little time discussing them.

OOP has three basic concepts: Encapsulation, Inheritance, and Polymorphism. Let’s start today by going over the first, encapsulation. Encapsulation is a little like Las Vegas. What happens in a class, stays in a class.

Instead of reading the word encapsulation, instead substitute “self contained”. Your classes should be like a little black box. You can rewire the inside all you want, as long as the end results to the outside world look the same. Let’s look at an example, a simplified version of the classic employee class.

using System;

using System.Collections.Generic;

using System.Text;


namespace OOPDemo

{

  class Employee

  {

    private string _firstname;

    private string _lastname;


    public string FirstName

    {

      get

      {

        return _firstname;

      }

      set

      {

        _firstname = value;

      }

    }


    public string Lastname

    {

      get

      {

        return _lastname;

      }

      set

      {

        _lastname = value;

      }

    }


    public string FullName()

    {

      return _firstname + ” “ + _lastname;

    }

  }

}


I’ve kept it very simple, two properties and one method, FullName. Here’s a simple example of creating (aka instantiating) an employee object out of the employee class, loading it’s properties, then calling the FullName method.


      Employee emp1 = new Employee();

      emp1.FirstName = “Arcane”;

      emp1.Lastname = “Code”;

      MessageBox.Show(emp1.FullName(), “FullName Dialog”);


Now let’s suppose, for whatever reason we need to rewrite the FullName method. In my example, we’ll pretend like a new coding standard has emerged that says you can never return a calculated value (like we did in the first write) but instead place it into a variable before returning it. This allows us to view the final result in the method quite easily.

We can do so, without having to change the routine (above) that called it. Here’s a new version of FullName.


    public string FullName()

    {

      string returnValue;

      returnValue = _firstname + ” “ + _lastname;

      return returnValue;

    }


When you run the application again, it still works. The routine that creates the emp1 object doesn’t know, and doesn’t care how you wrote the FullName routine. As long as you don’t change the method’s signature, you are free to rewrite FullName to your hearts content. That’s the beauty of encapsulation.

Arcane Thoughts: The Passion of the Programmer

One of my favorite bloggers is Jeff Atwood, and his Coding Horrors blog (http://www.codinghorror.com/blog/). Why? He’s passionate not just for code, but for coding.

I see a lot of people who are good at writing code. They know the syntax, can knock out some code, and get the application completed. Then there are people like Atwood, Steve McConnell, Paul Sheriff or Carl Franklin. These guys are passionate about the process of writing code.

When I speak of process, I’m talking about more than just writing, but the design of the code, how much reuse can you achieve from your existing components, do you do test driven development, waterfall, how often do you have code reviews, and more. This is the stuff that doesn’t help you write code, it helps you write better code.

Yesterday I had a root canal. I spent more than three hours in the dentists chair. Since there wasn’t much opportunity for stimulating conversation, I brought along my PDA and listened to some old DotNetRocks (http://www.dotnetrocks.com) episodes. In one of the episodes (http://www.dotnetrocks.com/default.aspx?showNum=104) Carl and Richard were interviewing Paul Sheriff on architecture.

During this episode, somewhere between the root canal and fitting a new crown, I realized that the coders who are passionate tend to also be architects, whether they realize it or not. They care about things like code reuse, good design, and adhering to standards.

If you are interested in learning more about architecture, I would recommend taking a look at the Patterns and Practices libraries at Microsoft. (http://msdn.microsoft.com/practices/). This is a collection of tools, e-books, and articles designed to not only recommend ways to architect your code, but the tools to get it done. Be sure to check out the “Getting Started” link on the upper left, it’s a good place get started on the road to not getting the job done, but getting the job done right.

Arcane Combinations: MaxiVista and UltraMon Tip

Two of my favorite Windows add-ins are MaxiVista and UltraMon. I’ve already blogged about each tool, https://arcanecode.wordpress.com/2006/08/30/9/ and https://arcanecode.wordpress.com/2006/09/06/multiple-monitors-made-even-easier/ respectively. When used together, they provide a great user experience, placing a task bar on each window.

I have discovered one issue when using the combo. My main computer is my big HP laptop. I also have my older desktop which has dual monitors, and my old IBM Thinkpad laptop which is handy for an e-mail monitor. I take these over from my laptop, using MaxiVista. When installed, MaxiVista sets up the HP Laptops internal monitor as #1, the desktop as monitors 2 and 3, and the Thinkpad as #4. I also have a big 21 inch monitor I hook to the HP Laptop, which becomes #5.

My problem arises when I don’t have the desktop turned on. UltraMon seems to check each monitor, and when it finds #2 is not on, it stops putting toolbars out. Very annoying. After a lot of searching I finally came upon a solution, and thought I’d share.

Right click on the UltraMon icon in the toolbar, and select Options… from the popup menu. Now click on the “Ignored Monitors” tab. Click on the monitor numbers that are not active, then check the “ignore this monitor” box.

[Picture of UltraMon Options]


There you go, just click on OK and your taskbar should appear. When you need activate the remote monitors, just open this and uncheck the “ignore…” option and you’re good to go!

Standard disclaimer, I don’t work for either company, nor make any money off sales, or receive any compensation. I just think they are some cool tools!

VS Add-In: Oracle Developer Tools for Visual Studio.Net

I found a useful and important add-in for those who deal with Oracle databases using Visual Studio. Oracle Developer Tools for Visual Studio.Net. ODT for VS adds an Oracle Explorer, similar to the Data Explorer built in to VS. It has an incredible amount of functionality built in.

I already mentioned the Oracle Explorer, which gives you a tree that lets you examine your tables (and columns), views, stored procedures, packages, sequences, and all of the other objects Oracle supports.

There’s a plethora of designers and wizards that will allow you to create and alter the aforementioned objects. They work by generating SQL that you can preview before it’s applied.

The feature I find most useful is the PL/SQL editor. Right inside VS I can now write my stored procedures. But what’s really powerful is I can set a breakpoint, and step from my VB.Net or C# code right into the stored procedure, step through the stored procedure, then back into my application. THAT is useful.

You can obtain ODT for VS directly from Oracle, at no cost. http://www.oracle.com/technology/tech/dotnet/tools/index.html or http://shrinkster.com/lry.

I did run into one issue after the install. Oracle installs it’s ODP driver and creates a new Oracle home for your machine. In order to make the connections I had to copy my tnsnames.ora, ldap.ora, and sqlnet.ora files from my old oracle home to the one for 10.2, by default it’s in C:\oracle\product\10.2.0\client_1\network\ADMIN. I found this solution and some other interesting tidbits at the FAQ: http://www.oracle.com/technology/tech/dotnet/col/odt_faq.html or http://shrinkster.com/ls0.    

I’m not going to regurgitate a lot of how to here, instead I’ll refer you to a good article on the Oracle site, at http://www.oracle.com/technology/oramag/oracle/06-sep/o56odp.html or http://shrinkster.com/lrz. This article has the basics to get you up and running.

If you work with Oracle databases, this is a must have add-on for your Visual Studio environment.

Delegates Made Easy in C#

During my discussion of SQL Server Compact Edition, I mentioned Delegates. I thought I’d take a moment to cover what a delegate is, and how you can effectively use them in your application.

Let’s say you send an employee to the mall, and tell him “OK, when you get to the mall I will tell you which store to go in, because right now I haven’t decided yet.” A delegate is somewhat like that. You can tell your application that you are going to call a method with a certain signature, but you will tell it the name of the method at run time instead of compile time. (The signature, in case you haven’t heard the term, is the name and return type of the method plus the list of the data types of the parameters you pass.)

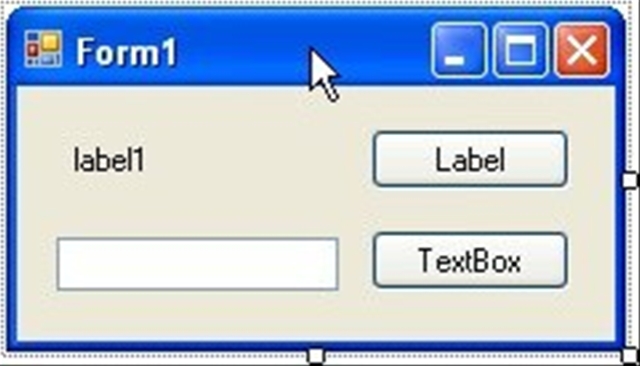
Let’s create a simple example. Create a new windows form app. Put on a label, a text box, and two buttons. When done, it should look something like this:

Now add a class, and name it “TheDoSomethingClass”. Once it’s created, we’ll need to put a declaration at the class level:  

    public delegate void DoDelegate(string msg);


We are creating a new variable type called DoDelegate. It’s descended from a Delegate, and has one parameter. It has to be pubic, so we can later create a variable of the DoDelegate type.

Next, we’ll add one method to the class, and pass in our delegate type.  

    public void DoSomething(DoDelegate doit)

    {

      for(int i=0; i < 3000;i++)

      if (doit != null)

      {

        doit(“Count=” + i.ToString());

      }

    }


This method has one parameter, “doit”. Notice that doit is of type DoDelegate. I created a little loop, just so we can see some action. Next, I check to see if the doit variable is null. This is very important, traditionally a delegate is never required but optional for use in your class. Thus you should always check to see if it’s null before attempting to use it. In the next line we actually call the doit method, and pass in it’s parameter, in this case a single string.

Now let’s look at how to use our delegate. Let’s return to our form, and add a new method. This method will be called ShowInLabel, accept a single string which it will display in the label control. I also added a DoEvents, just to get the label to update immediately.  

    private void ShowInLabel(string theMessage)

    {

      label1.Text = theMessage;

      Application.DoEvents();

    }

Now for the final step which ties everything together. In the click event for the button next to the label, we need to add two lines of code. The first line will instantiate a new object from our TheDoSomethingClass class. The second line will call the DoSomething method.  

    private void btnLabel_Click(object sender, EventArgs e)

    {

      TheDoSomethingClass dsc = new TheDoSomethingClass();

      dsc.DoSomething(

         new TheDoSomethingClass.DoDelegate(ShowInLabel));

    }


Notice something important: in the second line we create a new variable of type DoDelegate. Perhaps if I do it in 3 lines it will make it slightly clearer.


      TheDoSomethingClass dsc = new TheDoSomethingClass();

      TheDoSomethingClass.DoDelegate myNewDoDelegate

        = new TheDoSomethingClass.DoDelegate(ShowInLabel);

      dsc.DoSomething(myNewDoDelegate);


As part of the constructor, we pass it the name of a method that has the same signature as the delegate. In this case, ShowInLabel has the same signature (one parameter, a string) as the delegate was declared with. The Delegate’s signature and the signature of the method you want to assign to it must match or you’ll get an error.

Now let’s flex our power a little. Create another method with a different name, but the same signature. This one we’ll call ShowInTextBox, and like the other we have to have one string as a parameter. In this method we will update the text box instead of the label with the passed in message.  

    private void ShowInTextBox(string theMessage)

    {

      textBox1.Text = theMessage;

      Application.DoEvents();

    }

Now in the click event for the button associated with the text box, we’ll repeat the code from the other button with one exception. In the constructor, we’ll pass in the name of the new method.  

    private void btnTextBox_Click(object sender, EventArgs e)

    {

      TheDoSomethingClass dsc = new TheDoSomethingClass();

      dsc.DoSomething(

        new TheDoSomethingClass.DoDelegate(ShowInTextBox));

    }

DoDelegate method what so ever, yet it was able to call a completely different method.

You can also store the delegate, in case you want to use it for several methods in your class, or manipulate it a bit easier. Put this code in your class (note I squished down the get/set to save a bit of space, I don’t normally code that ugly.) I added a private variable to hold our delegate, a property get / setter, and a new method that will take advantage of it.  

    private DoDelegate _TheDelegate;


    public DoDelegate TheDelegate

    {

      get

      { return _TheDelegate; }

      set

      { _TheDelegate = value; }

    }


    public void DoSomethingElse()

    {

      for (int i = 0; i < 3000; i++)

        if (_TheDelegate != null)

        {

          _TheDelegate(“Count=” + i.ToString());

        }

    }

Now to call it, all we have to do is go back to our form and add this code to a button click event:

      TheDoSomethingClass dsc = new TheDoSomethingClass();

      dsc.TheDelegate

        = new TheDoSomethingClass.DoDelegate(ShowInLabel);

      dsc.DoSomethingElse();

      dsc.TheDelegate

        = new TheDoSomethingClass.DoDelegate(ShowInTextBox);

      dsc.DoSomethingElse();

Note here I changed the delegate between calls, I could have also coded more methods that used the same call. Also note if I had tried calling DoSomethingElse before assigning a delegate, the program would have run just fine I just wouldn’t have been shown any messages, thanks to the if ( _TheDelegate != null) statement.

Now that I’ve shown you how a delegate works, let’s take a moment to discuss some times when you might want to use it. The first example I can think of is to support an add in architecture. You can dynamically load DLLs at run time, and when you do you can query it to see if it supports a certain delegate type, perhaps one for communicating a message like our example. If so, you can assign that delegate to the message handler for your particular app. Not only does this mean you can use multiple add-ins with the same app, it also means you could support multiple apps with one add-in.

Here’s another example from my personal experiences. I have a winforms app that can connect to multiple database. (Each of our sites has it’s own database.) Most users only need to connect to one, so I save the database they were last connected to in the settings file. When the user reloads the app, I reconnect to the same database.

When my app loads, there are a lot of lists of values I retrieve to populate drop down combos. During load, however the only form visible is my splash screen. Using delegates in my load routine I have all progress messages from my data layer displayed on the splash screen.

During the course of using my program, the user can choose to hook to a different site, and hence a different database, which means I have to reload all those lists of values again. This time though, I don’t have the splash screen up. True, I could show it again, but it would look really goofy.

Instead, in my load routine I instead pass a delegate to the data layer that instead will display progress messages on the status bar control at the bottom of the form.

The beauty of this is that the data layer has no clue where or if it is displaying messages, nor should it have to care. I can also reuse this data layer DLL in other apps down the road, should the need arise, and take advantage of the status messages it provides.

In my example I have kept it simple and used a single parameter for my delegate. Know that you are not restricted; you can use multiple parameters if you wish. The important thing to remember is your signatures must match. The return type and number of parameters for your delegate (DoDelegate) must match the signature of the methods you assign to it (ShowInLabel, ShowInTextBox).

When designing your classes, especially those destined for DLL libraries that could get multiple use, consider adding some delegates as a way to inform your consumer of the progress of your methods.

There you go, a short step by step for delegates in C#. If you think of some new uses for delegates, drop a comment and let us know.

Programming Possum

I’d like you to meet my Programming Possum. His name is Floyd the Ferocious, and he is one of my biggest helpers in coding.

[Programming Possum]

Floyd was a Christmas gift from my wife, to commemorate the dead possum I found in my hot tub shortly before Thanksgiving. Seems that possum was assigned to write an application in VB4 that generated Java code to be an interop layer between a Perl app and Ruby on Rails program.

Poor guy grabbed his chest and just keeled over in my hot tub, turning himself into a hot possum stew. I found him about four days later, when I went to top off the tub. The smell was, well it was something Mike Row would have wrinkled his nose at. And the stew was now a nice murky black. Yum, soups on!. But I digress.

A few weeks ago I was catching up on my Dot Net Rocks episodes. In episode 205 (http://www.dotnetrocks.com/default.aspx?showNum=205#download) guests Venkat Subramaniam and Andrew Hunt were talking about Agile Programming, and one of them mentioned he keeps a rubber duck on his computer. He keeps his duck around for the same reason Floyd hangs out on top of my monitors, to squash bugs.

Have you ever gone to one of your coworkers and started to explain an issue, when all of a sudden you smacked yourself in the head and gone “OK I know how to fix it now thanks!” Your coworker wittily replies “Uh, OK”.

For me, my Programming Possum is the first person I talk to about my issues. He’s like a hairy therapist with a tail, very attentive listener and never interrupts. (I used to talk to pictures of my wife, but found I kept getting interrupted.) About forty percent of the time, I find that I can work through all the alternatives and come up with a resolution. And if I can’t, when I do have to visit my coworkers at least my thoughts are more organized and coherent.

It doesn’t have to be a possum, it could be a rubber duck or even a rubber chicken. Scott keeps a yellow chicken by his cube.

[White Chicken]

Ben, another coworker, has a yellow chicken which keeps an eye on his code. (Which frankly we all think is a bit weird. I mean, who ever heard of a yellow chicken? White, sure, even brown or black, but yellow? I guess that’s where brown eggs come from.)

Whatever you pick, we all recommend you get your own Programming Possum. Something to focus on so you can talk your issues through while you look for solutions. You’d be surprised at how often it’ll work for you.

And don’t worry about your coworkers thinking you are nuts. I’ve talked to them, and they already think that.

Floyd the Ferocious, Programming Possum

Loading a SQL Server Compact Edition Table From a DataTable in C#

Of all the situations you can be in using SSCE, I think one of the most common will be to pull data from a larger database provider and populate a table in your local SSCE database. While SSCE does have some nifty replication support, it only works with SQL Server. Like many of you I have to support data coming from many different places, such as Oracle, Access, and XML to name but a few.

The easiest way to pull the data is to get it into an ADO.Net DataTable, but what then? I sure didn’t want to have to create the insert statements by hand each time, plus I wanted to be able to reuse my routines. Being a lazy individual, I wanted a routine I could pass any DataTable into and push the data into my SSCE table.

I started with a blank class, and created a few class level variables. One was out of a SqlCeConnection which I named _connection. I also had two strings to hold the database name and password. Next, I created a “ConnectionString” method, identical to what I described a few days ago.

    private string ConnectionString()

    {

      return string.Format(

        “DataSource=\”{0}\”; Password='{1}'”

        , this._CacheDatabase

        , this._Password);

    }


I then created an Open method, which is pretty simple:


    public void Open()

    {

      if (_connection == null)

        _connection = new SqlCeConnection(this.ConnectionString());


      if (_connection.State == ConnectionState.Closed)

        _connection.Open();

    }


OK, now for the grand finale.


    public void Populate(DataTable myDataTable

      , string tableName)

    {

      // If the datatable has no rows, we’re wasting

      // our time, get outta dodge.

      if (myDataTable.Rows.Count == 0)

      {

        return;

      }


      // Make sure database is open for business

      this.Open();


      // Use a string builder to hold our insert clause

      StringBuilder sql = new StringBuilder();

      sql.Append(“insert into “ + tableName + ” (“);


      // Two more, one for the list of field names,

      // the other for the list of parameters

      StringBuilder fields = new StringBuilder();

      StringBuilder parameters = new StringBuilder();


      // This cycles thru each column in the datatable,

      // and gets it’s name. It then uses the column name

      // for the list of fields, and the column name in

      // all lower case for the parameters

      foreach (DataColumn col in myDataTable.Columns)

      {

        fields.Append(col.ColumnName);

        parameters.Append(“@” + col.ColumnName.ToLower());


        if (col.ColumnName !=

          myDataTable.Columns[myDataTable.Columns.Count

                 – 1].ColumnName)

        {

          fields.Append(“, “);

          parameters.Append(“, “);

        }

      }

      sql.Append(fields.ToString() + “) “);

      sql.Append(“values (“);

      sql.Append(parameters.ToString() + “) “);


      // We now have our Insert statement generated.

      // At this point we are ready to go through

      // each row and add it to our SSCE table.

      int rowCnt = 0;

      string totalRows = myDataTable.Rows.Count.ToString();


      foreach (DataRow row in myDataTable.Rows)

      {

        SqlCeCommand cmd

          = new SqlCeCommand(sql.ToString(), _connection);


        foreach (DataColumn col in myDataTable.Columns)

        {

          cmd.Parameters.AddWithValue(“@”

            + col.ColumnName.ToLower()

            , row[col.ColumnName]);

        }

        // Optional: I created a delegate called message delegate,

        // and assign it to the class level variable Cachemessage

        // It’s a simple method that takes one string and displays

        // the results in a status bar. If you want to simplify

        // things, just remove this entire section (down to

        // the try).

        rowCnt++;

        if (_CacheMessage != null)

        {

          if ((rowCnt % 100) == 0)

            _CacheMessage(“Loading “ + tableName

              + ” Row “ + rowCnt.ToString()

              + ” of “ + totalRows);

        }


        try

        {

          // Here’s where all the action is

          // sports racers! This is what sends

          // our insert statement to our local table.

          cmd.ExecuteNonQuery();

        }

        catch (Exception ex)

        {

          // You’ll probably want to be a bit more

          // elegant here, but for an example it’ll do.

          throw ex;

        } 

      } 

    }


My code comments elaborate pretty well on what’s going on, a quick read should be all you need. Only two things to really point out. First, I create a delegate to send a progress message. I’ll go into more on delegates another day, if need be, there’s a ton of info on them out on the web. Let me show you the declarations I used for my delegates so you can repeat them in your class:


    private CacheMessageHandler _CacheMessage;


    public void Messenger(CacheMessageHandler messageRoutine)

    {

      _CacheMessage = messageRoutine;

    }


I created a method in the calling program called ShowStatus. Very simple, takes one string as a parameter and displays it somewhere to the user. (I chose a status bar, you might use a label). All I had to do was call the Messenger method like so: 

    myMethod.Messenger(

         new MyClass.CacheMessageHandler(ShowStatus))


In retrospect I could also have created a CacheMessage property, I just didn’t think of it at the time. If you paste in the declarations you should be able to use the method even though you never use the delegate (note I check to see if _CacheMessage is null) but if you have issues, just delete that small section, it’s not that important to the process of loading the table.

The other major thing, and a gold star to you if you already noticed this: in order for this method to work, the column names in your DataTable must match exactly with the column names in your SSCE table!

Personally this seems like a small price to pay, and frankly if you are replicating data it will make your debugging and programming life much easier as you work through bugs. I do this as a standard, which is why this kind of routine fits well into my environment.

This wraps up (for now) my exploration of SQL Server Compact Edition. If you have decided to leverage SSCE in your own apps, please leave a comment, let us all know what your experiences have been, problems, benefits, and the like.

Inserting Rows Into A SQL Server Compact Edition Table in C#

Now that we have some tables, you naturally want to put some data into them. As you might have guessed from my last post, you perform data manipulation (insert, update, delete) just like you do when creating the table and use the SqlCeCommand object. Only this time there’s a twist.

First, because I wanted to load several rows I created a method to load a single row and pass in the parameters to my “CoolPeople” table. Here’s the small bit of code that handles it:  

        LoadARow(“Carl”, “Franklin”, @”http:\\www.dnrtv.com”);

        LoadARow(“Richard”, “Campbell”, @”http:\\www.dotnetrocks.com”);

        LoadARow(“Leo”, “Laporte”, @”http:\\www.twit.tv”);

        LoadARow(“Steve”, “Gibson”, @”http:\\www.grc.com”);

        LoadARow(“Arcane”, “Code”, @”http:\\arcanecode.wordpress.com”);


I then wrote a routine that would take the passed in data and insert it into the database. As with my create table example yesterday, I’m using the command object. This time though, I am adding parameters to the command.

If you look in the SQL, you see I have three parameters, noted by the @ sign. @first, @last, and @url. When SSCE creates the insert statement for the database, it will then look for three parameters and replace these three @ placeholders with the values you put into the parameters.

Sure, you could concatenate it all together in a string, but then you have to worry about things like the “O’Malley Issue” and SQL Injection attacks. (See Bill Vaughn’s book “Hitchhiker’s Guide to Visual Studio and SQL Server, 7th edition for a complete discussion on these topics, or browse the web. There’s lots of info so I won’t take up further space now.)

Here’s the entire LoadARow routine. Note that my choosing to name the method parameters the same as the SSCE command parameters is entirely a coincidence, it simply makes it self documenting and is not a requirement.


    private void LoadARow(string first, string last, string url)

    {

      SqlCeConnection cn = new SqlCeConnection(ConnectString());


      if (cn.State == ConnectionState.Closed)

      {

        cn.Open();

      }


      SqlCeCommand cmd;


      string sql = “insert into CoolPeople “

        + “(LastName, FirstName, URL) “

        + “values (@lastname, @firstname, @url)”;


      try

      {

        cmd = new SqlCeCommand(sql, cn);

        cmd.Parameters.AddWithValue(“@lastname”, first);

        cmd.Parameters.AddWithValue(“@firstname”, last);

        cmd.Parameters.AddWithValue(“@url”, url);

        cmd.ExecuteNonQuery();

        lblResults.Text = “Row Added.”;

      }

      catch (SqlCeException sqlexception)

      {

        MessageBox.Show(sqlexception.Message, “Oh Crap.”

          , MessageBoxButtons.OK, MessageBoxIcon.Error);

      }

      catch (Exception ex)

      {

        MessageBox.Show(ex.Message, “Oh Crap.”

          , MessageBoxButtons.OK, MessageBoxIcon.Error);

      }

      finally

      {

        cn.Close();

      }

    }


After creating the SqlCeCommand object by passing in the sql string and the connection object, I can then add the parameters with a single line for each. By using the Parameters object of the command object, I can call the AddWithValue method, and simply pass in the parameter name as a string and the value for that parameter. Once you add all the parameters, simply call the ExecuteNonQuery method and the data is inserted!

This method can be a basis for all your future work with SSCE. Everything you need to do revolves around the command object and sending SQL commands to the database. Need to delete a record? Just change the SQL from an insert to a delete, pass the correct parameters and you are in business. Update? Same thing.

Using the code I’ve shown in this series you can create your own SSCE applications, and store data locally. Lest you think this is the wrap up, I have one more cool method to show you, but that’ll be for tomorrow!

Create a Table in SQL Server Compact Edition with C#

Before we create a table in SSCE, you need to understand that SSCE only supports a subset of the data types provided in full SQL Server. The specific list is: bigint, integer, smallint, tinyint, bit, numeric (p, s), money, float, real, datetime, national character(n) (Synonym:nchar(n)), national character varying(n) (Synonym:nvarchar(n)), ntext, nchar, binary(n), varbinary(n), image, uniqueidentifier, ROWGUIDCOL , and IDENTITY [(s, i)].

The last two, strictly speaking are not data types but properties of the data column. SSCE was designed to be small and lightweight (hence the Compact name). To keep it small, many of the datatypes were eliminated.

A full list, with detailed explanations can be found at on the MSDN site: http://msdn2.microsoft.com/en-us/library/ms172424.aspx or http://shrinkster.com/lij.

Now that you know what’s available, let’s talk about how to create a table. In keeping with it’s theme of compactness, SSCE doesn’t include classes for manipulating the structures inside a SSCE database directly. Instead, you have to do everything through SQL DDL (Data Definition Language) statements. You know, Create Table, Drop Table, etc.

The code below shows the fairly simple steps involved. First you need to open a connection to the database. You do this by creating a SqlCeConnection object and passing in the connection string. The connection string has the same format I described in my previous post on creating the database.

Next, we create a string to hold some SQL (sql), and create a SqlCeCommand object (cmd). Finally we call the ExecuteNonQuery method of the command object to kick off the SQL. Here’s the code, with some try / catch logic thrown in to trap for errors.


      SqlCeConnection cn = new SqlCeConnection(ConnectString());


      if (cn.State==ConnectionState.Closed)

      {

        cn.Open();

      }


      SqlCeCommand cmd;


      string sql = “create table CoolPeople (“

        + “LastName nvarchar (40) not null, “

        + “FirstName nvarchar (40), “

        + “URL nvarchar (256) )”;


      cmd = new SqlCeCommand(sql, cn);


      try

      {

        cmd.ExecuteNonQuery();

        lblResults.Text = “Table Created.”;

      }

      catch (SqlCeException sqlexception)

      {

        MessageBox.Show(sqlexception.Message, “Oh Fudge.”,

          MessageBoxButtons.OK, MessageBoxIcon.Error);

      }

      catch (Exception ex)

      {

        MessageBox.Show(ex.Message, “Fooey.”, MessageBoxButtons.OK,

          MessageBoxIcon.Error);

      }

      finally

      {

        cn.Close();

      }


There’s a few things I’d like to point out. First, the connection. In this simple example, I opened and closed the connection in the same routine. For talking to large databases, especially when doing so from a web app, this methodology makes a lot of sense. You keep the connection open for a brief time and reduce the load on your server.

With SSCE however that need does not exist. The database is local with one connection, so you save nothing by the brief open / close connection, and instead slow yourself down. With SSCE I would recommend you open the connection when your application launches, and close it when it exists. Pass it to the classes that need it. You will gain a lot of speed doing so, and minimal cost in terms of memory.

The other thing to note, within the line that instantiates the new SqlCeConnection I have a method called ConnectString(). To make life easy for my demo I encapsulated the connection string in a method that returns a string. You could place your connection in a string, method, or whatever is convenient for you. I already documented the code to create a connection string in yesterday’s post on creating a database, so I won’t bore you with it again.

Would you like to see the database? Cool. Open up SQL Server Management Studio (I’m guessing you have SQL Express or SQL Server Developer Edition installed). When it opens, pick SQL Server Mobile as the database type. Under Database File, click the Browse for more… option and navigate to the sdf file you created, and click on OK. Enter in the password, and click OK again to open the database.

Now you can do many of the normal things you’d do with a SQL Server database. Click on the Tables in the tree and you should see it expand and show our “CoolPeople” table. You can drill down further to see all the fields.

OK, we’ve created our table, the next step will be to load it. But that’s for the next post!

Create a SQL Server Compact Edition Database with C#

Before I start on the coding route, I found one other component you might want to download for SSCE. It’s not absolutely needed, but makes life in VS much easier. It’s the SSCE Developer SDK. It has the Northwind sample database, CAB files for installing SSCE on mobile devices, and MSI for installing the help files, and more. Grab it at the URL below and install all the goodies.

http://www.microsoft.com/downloads/details.aspx?FamilyId=E9AA3F8D-363D-49F3-AE89-64E1D149E09B&displaylang=en or http://shrinkster.com/lho

OK, let’s have a little fun. First thing I did was create a test app using a Windows Forms application. Next thing you need to do is create a reference to the SSCE. Click on Project, Add Reference. According to all directions I’ve read, all you have to do is be on the .Net tab, scroll down to System.Data.SqlServerCe, click on it and click OK. Found it?

Nah, I couldn’t find it either. So here’s the part the instructions don’t tell you. Go click on the Browse tab. Now navigate to C:\Program Files\Microsoft SQL Server Compact Edition\v3.1. Now pick the System.Dadta.SqlServerCe.dll, click on it, then click on OK to pull in the reference. (That little nugget will save you a lot of hair pulling, and if you did find it then good for you, just click on it and keep going.)

Now let’s write some code. First, go to the head of the class, whoops I mean header of your class and let’s create a using reference.  

using System.Data.SqlServerCe;

using System.IO;

While I was at it I also set a reference to the System.IO namespace since we’ll want to check for the databases existence. Now in a method somewhere, let’s setup a few variables. Then we’ll check to see if the database already exists. Since this is just a sample, I’m going to delete it. This would be a valid action if the database was just a temporary cache for reports. In your situation you might want to return an error, or just exit gracefully without causing any problems.


      string connectionString;

      string fileName = “ArcaneCode.sdf”;

      string password = “arcanecode”;


      if (File.Exists(fileName))

      {

        File.Delete(fileName);

      }


      connectionString = string.Format(

        “DataSource=\”{0}\”; Password='{1}'”, fileName, password);


You can see the last thing I did was establish the connection string. Some very important things you need to note. First, the DataSource must be surrounded with double quotes. The password, on the other hand, must be surrounded with single quotes.

In this example I’m just giving the database an SDF name, and letting it drop in the current directory. You could hard code a full path, or put it in a variable.

OK, we’ve got everything setup. Turns out it’s quite easy to create a new database. First, we create a new instance of a SqlCeEngine, and initialize it by passing the connection string into the constructor. Then, it’s as simple as calling the CreateDatabase method of the engine.  

      SqlCeEngine en = new SqlCeEngine(connectionString);

      en.CreateDatabase();


And that’s all there is to it. Looking in our bin debug folder we see the new database:


[Picture of ArcaneCode.sdf]


Of course an empty database doesn’t do us a lot of good, so in the next installment we’ll start creating some tables, and maybe even put a little data in them.

Ruler

While my life is busy being turned upside down by the SSIS scripts I’ve been testing, let me take this chance to fill you in on a cool new tool I found for Windows (I promise to get back to the SQL Server Compact Edition stuff soon!).

This tool is very cool, no matter what you happen to do for a living, be it a web designer, programmer, or even a housewife who loves graphics. It’s Ruler, it displays a simple ruler on the screen like so:

[Picture of Ruler]

Here you can see I’ve placed the ruler over yesterday’s blog entry. The ruler can be resized by simply holding the mouse cursor over the edge, clicking and dragging as you would resize a normal window.

Pressing the spacebar will flip the ruler from horizontal to vertical. Right click on the ruler to access the menu options. You can control the opacity, and set it to “Stay on Top” mode among other things.

It also supports “nudging” via the keyboard when you need to place or size it exactly. The arrow keys will move the ruler five pixels, CTRL+Arrow moves it one pixel, and CTRL+Shift+Arrow will resize the ruler.

This delightful little tool can be found for free at http://www.sliver.com/dotnet/Ruler/. You can even download the source, in case you want to add your own enhancements. It consists of 3 simple files that don’t even have to be installed, just unzip and place in a directory.

I love this thing, I have often wished I had a pixel ruler and this has found a permanent place in my toolbox. Kudos to Jeff Key (http://weblogs.asp.net/jkey/) for writing this gem.

SSIS Package Not Reading Environment Variables

My work today on SQL Server Compact Edition (see yesterday) has gotten interrupted by some issues with a SQL Server Integration Services (SSIS) package. We keep our connection strings inside environment variables, and had this one package that just would not read those environment variables correctly. To further compound our fun, our development platform is using a 32 bit version of SSIS but our test server is running 64 bit SSIS.

We finally corrected the issue by opening the package in BIDS (Business Intelligence Developer Studio, basically Visual Studio with some SQL Server components loaded into it). Once open, we deleted the connections, recreated them, and then redeployed the package.

And ta-da! It suddenly started working correctly. I put this out here for two reasons: first, to pass along our knowledge in case you are having the same issue. Second, if you’ve had this issue I’m curious to know about it, please leave a comment and let me know your experience.